

How to upgrade to GA4 (Google Analytics 4)?
GA4 is the latest version of Google Analytics, it’s formerly known as App + Web. You can use it for a website, an app, or both a website and app together. Universal Analytics properties only support websites. Google has made GA4 the default experience for analytics properties and strongly encourages users to upgrade to Google Analytics 4 properties.
The question here, do we need to upgrade to GA4, and when? Is Google deprecating universal analytics soon? Google hasn’t announced any news on killing universal analytics properties so far, however, they have stopped allocating resources to develop and roll new features in universal analytics. All their team focus and efforts are now going to GA4 properties. Therefore, sooner or later universal analytics properties are coming to an end, and we better be ready when this time comes.
In this article, you will learn how to upgrade to GA4 and run Google Analytics 4 in parallel with the old version of Google Analytics (Universal Analytics).
Install GA4 alongside universtal analytics
Setting up GA4 properties shouldn’t interfere with universal analytics, your Universal Analytics property is left unchanged and continues to collect data. When upgrading to GA4, it creates a brand new property in your account.
Please note that your new GA4 property won’t have any historical data. Your GA4 property only collects data going forward. To see historical data, use the reports in your Universal Analytics property. Therefore, it’s recommended to upgrade to GA4 and give it sufficient time to collect data before you can rely on it to view historical data or make decisions based on those historical trends
Let’s begin and explain what you need to do to migrate to Google Analytics 4.
How to upgrade to GA4?
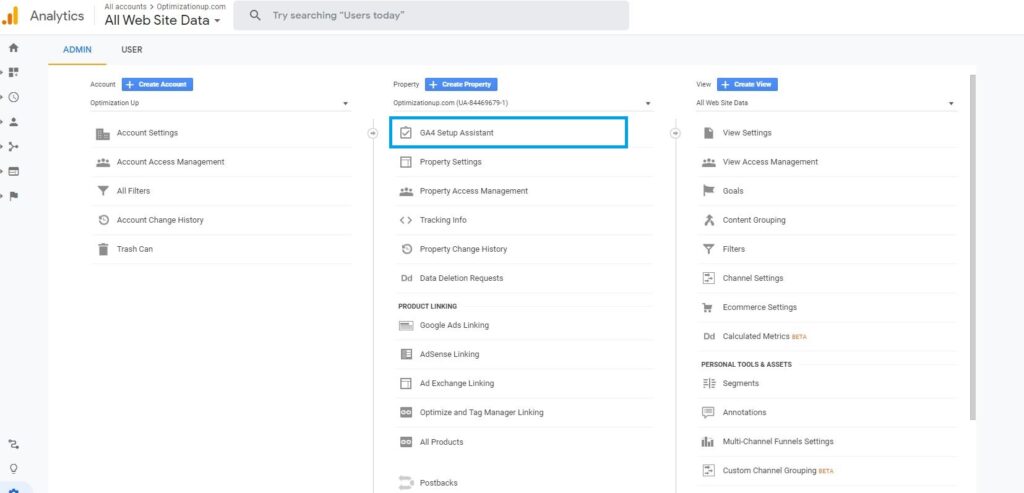
1- Navigate to Google Analytics and click Admin
2- Select GA4 Setup Assistant in the Property column
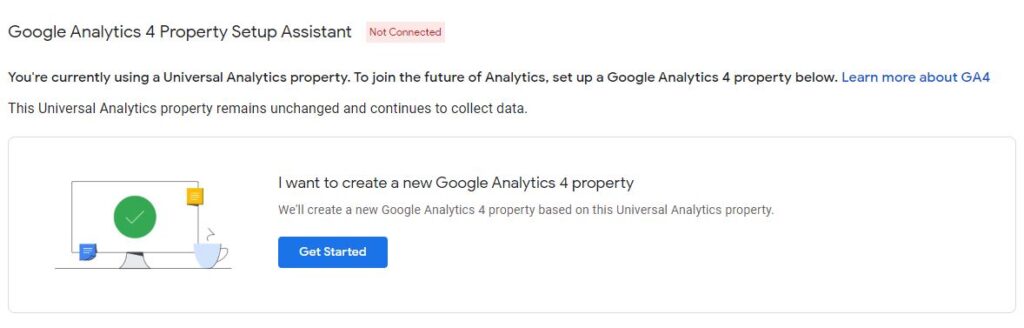
3- Click Get started under “I want to create a new Google Analytics 4 property”
4- Click Create Property
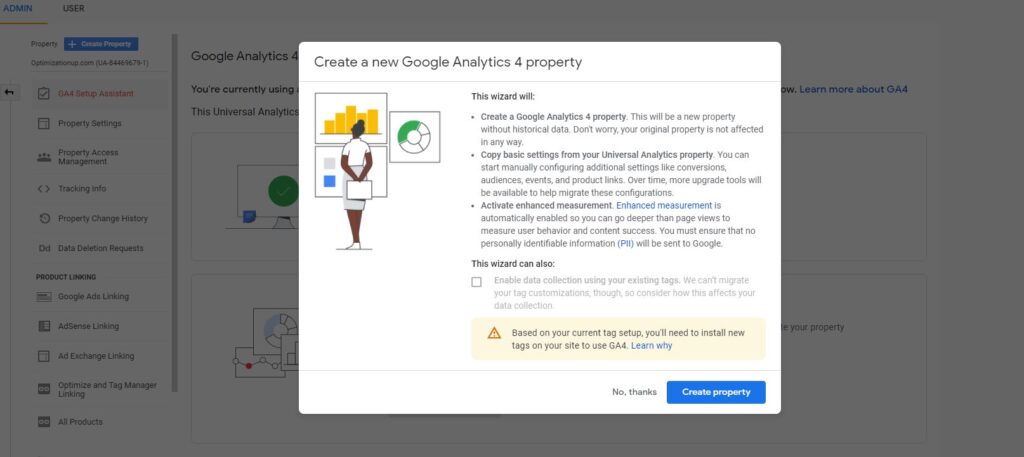
Once this process is complete, you should have a GA4 property and it’s time now for tag installation.
There are 2 ways to add the GA4 tracking code to your website.
1- Add GA4 tag directly to your website pages
If you use any of the CMS below, you can view the relevant guide on how to add the GA4 tracking code to your CMS’s pages:
If you don’t use any of the CMS above, to add the GA4 tracking code to your website, you’ll need access to your web pages HTML. Ask your web developer to perform these steps if you’re unable to do this yourself.
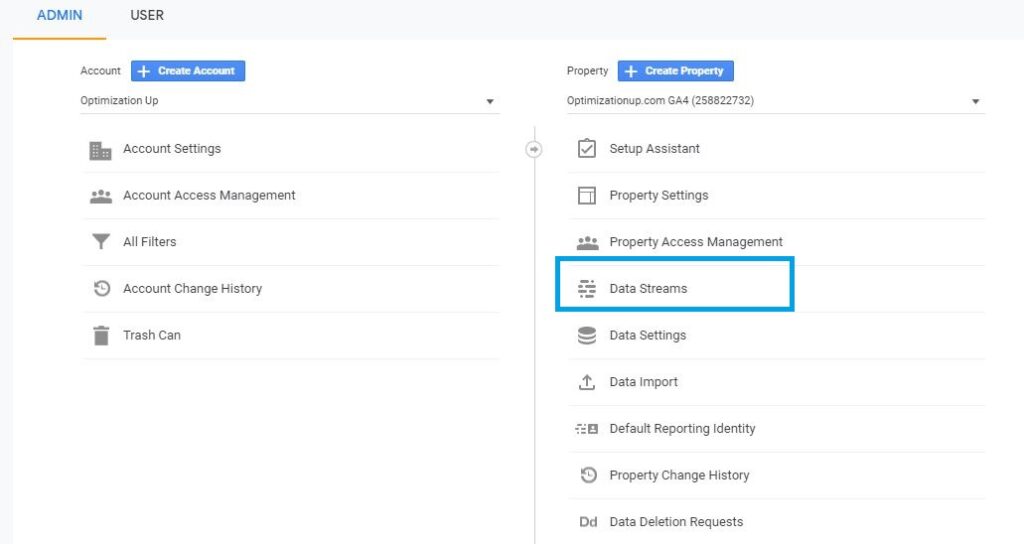
1- Navigate to your GA4 property and Click Admin.
2- Click Data Streams, then Web. Click the data stream.
3- Under Tagging Instructions, click Add new on-page tag and look for “Global Site Tag (gtag.js)”. Your Analytics page tag is the entire section of code that appears in the screenshot:
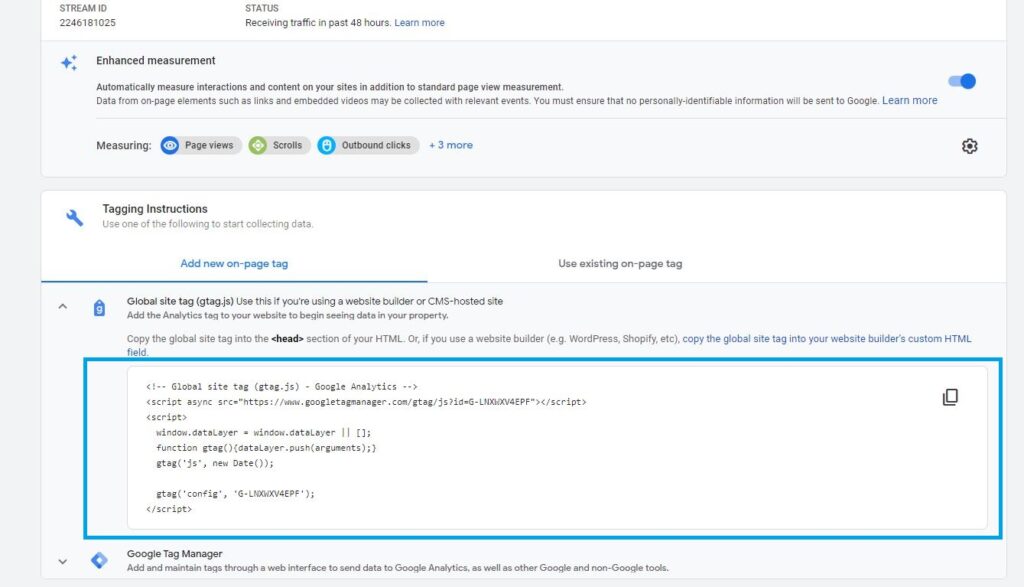
4- Copy and paste your entire Analytics page tag immediately after the <head> tag on each page of your website. Don’t remove your old universal tag it will continue to collect data for your Universal Analytics property. The new tag that you’re adding will collect data for your new Google Analytics 4 property.
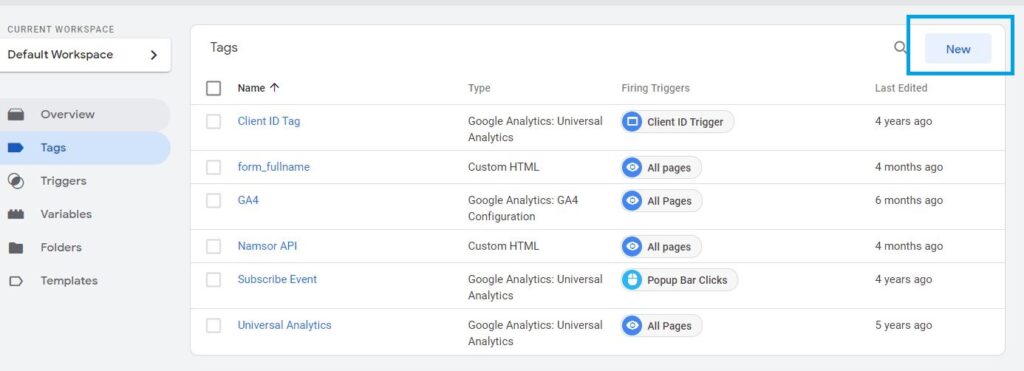
2- Add GA4 tag using Google Tag Manager
If you are using Google Tag Manager, you can add a new tag for GA4 in parallel to the existing universal Google Analytics tag. Head to your GTM account and follow the instructions below:
1- Click Tags > New.
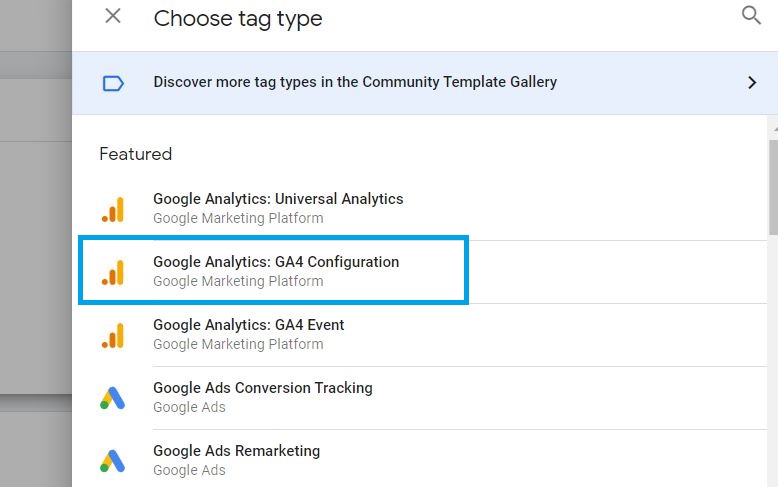
2- Click Tag Configuration.
3- Select Google Analytics: GA4 Configuration.
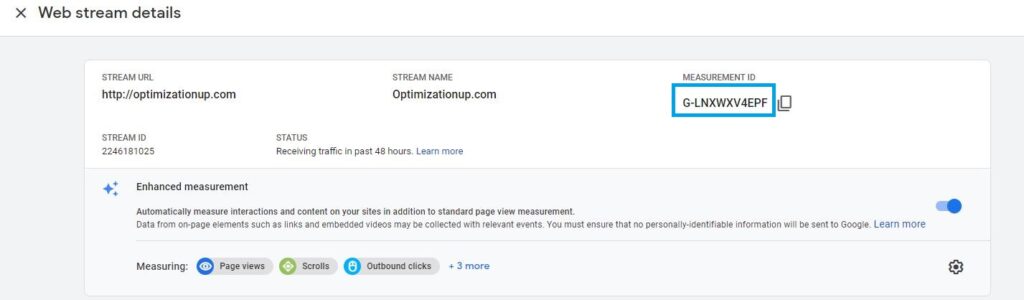
4- Enter your Measurement ID. You can copy it under data stream in the admin tab of your GA4 property
5- Add All Pages trigger
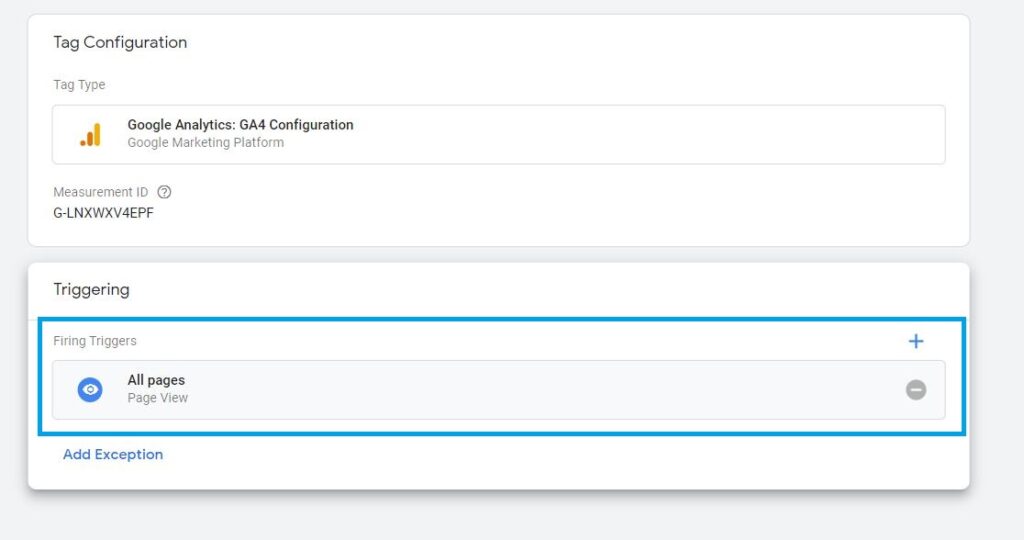
5- Save and Publish your container
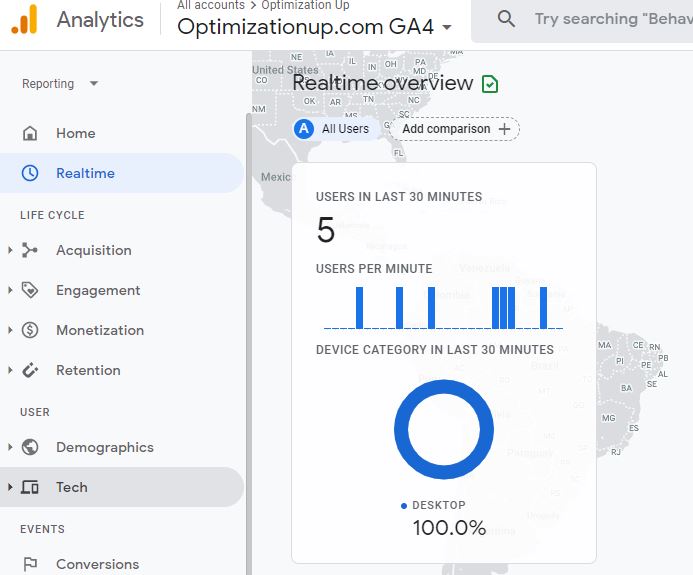
How to check if GA4 is installed correctly
You can then use the real-time report to verify that you’re receiving data. With Realtime, you can immediately and continuously monitor the activity on your website, so make sure to visit your website and navigate to the report tab.

Entrepreneur focused on building MarTech products that bridge the gap between marketing and technology. Check out my latest products Markifact, Marketing Auditor & GA4 Auditor – discover all my products here.
1 Comment