
Server-Side Tracking via Facebook Conversion API
The rise in data protection and privacy regulations has created new challenges that have serious implications on the entire digital industry. Web browsers like Safari and Mozilla have released a range of updates, like Intelligent Tracking Prevention (ITP), that work against tracking technologies by blocking third-party cookies and applying restrictions on the first-party cookies as well.
In order to prepare for this, companies like Google and Facebook have developed a new tracking method called server to server that allows businesses to send data and events from their servers back to the ads’ servers.
Facebook Conversion API is one of the solutions that allow advertisers to overcome those restrictions and collect the data in the backend and send it directly from the server to Facebook via the API. Today, I will walk you through the implementation steps to set it up.
1- Get your Access Token
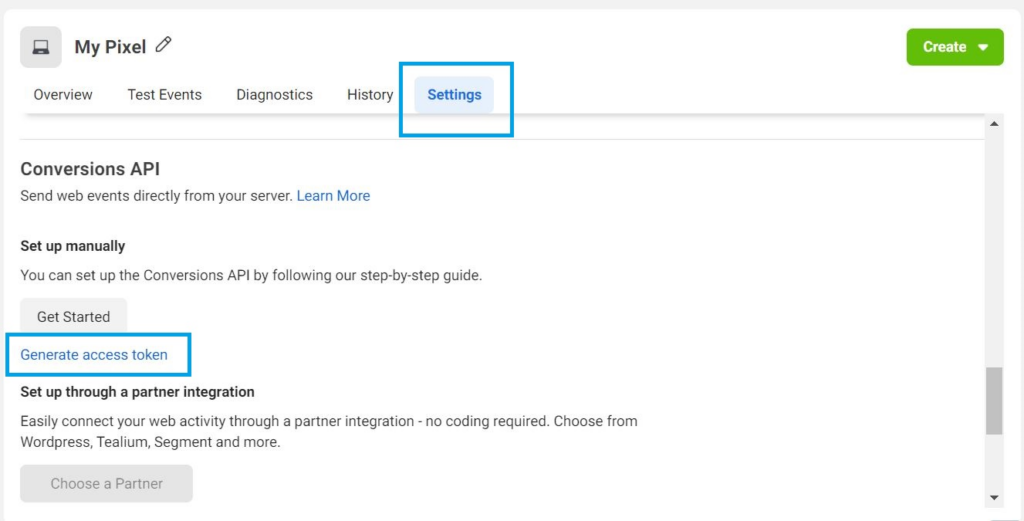
To use the Conversions API, you need an access token that is passed as a parameter in each API call. The easiest way to generate a token is through the Event Manager.
Pick the pixel you want to implement, click settings, then generate access token.
2- Select your Events
Go to the ‘Overview’ tab of your pixel and click ‘Add Events’ then select ‘Using the Conversion API’.
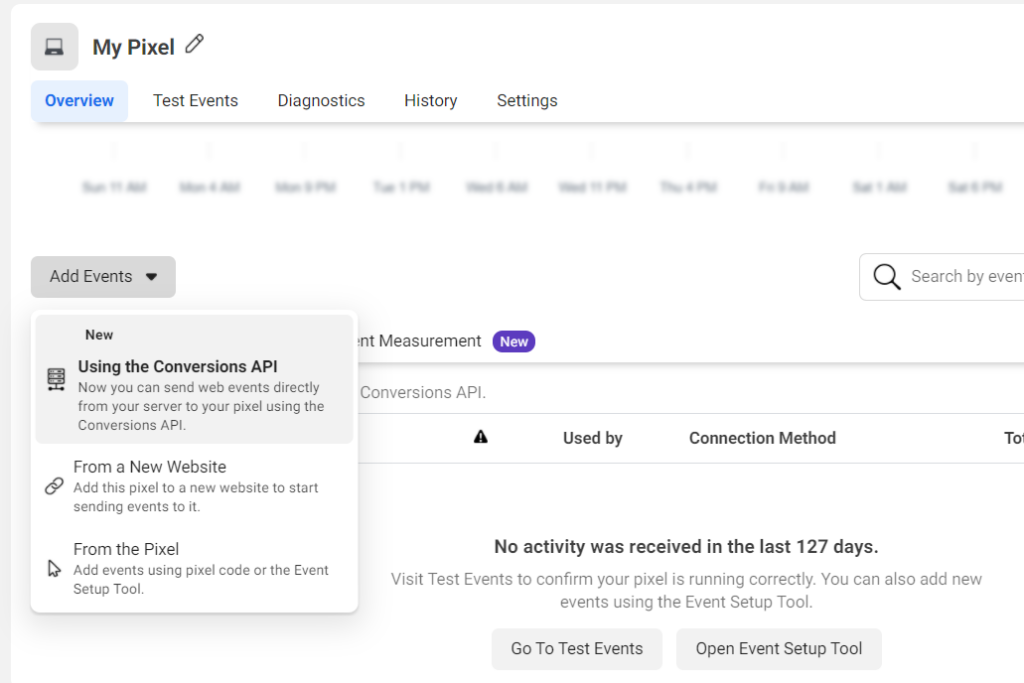
You will be asked how you want to set up the conversions API. If you’re lucky to be using any of those partner technologies, then follow the relevant guide.
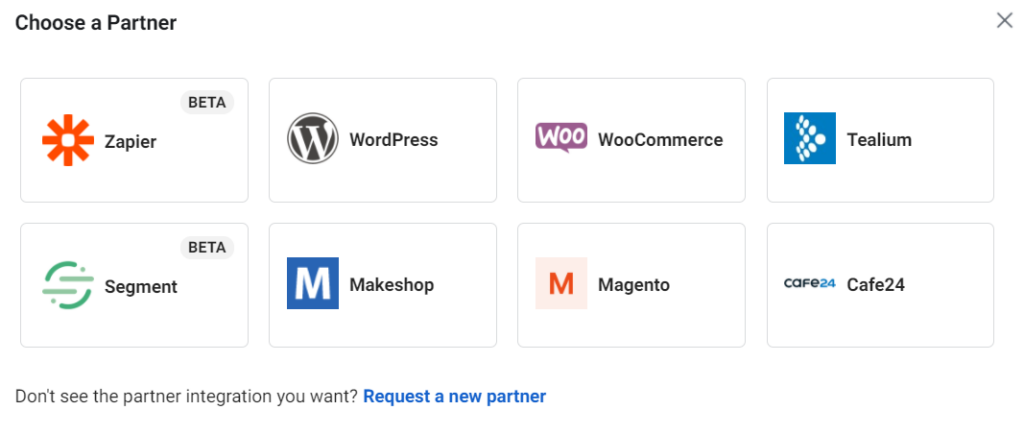
In this article, I’ll go through how to set up the conversion API tracking manually. You will be guided to choose your industry and the type of events you want to collect. For the sake of the demo, I will just choose one event which is Lead:

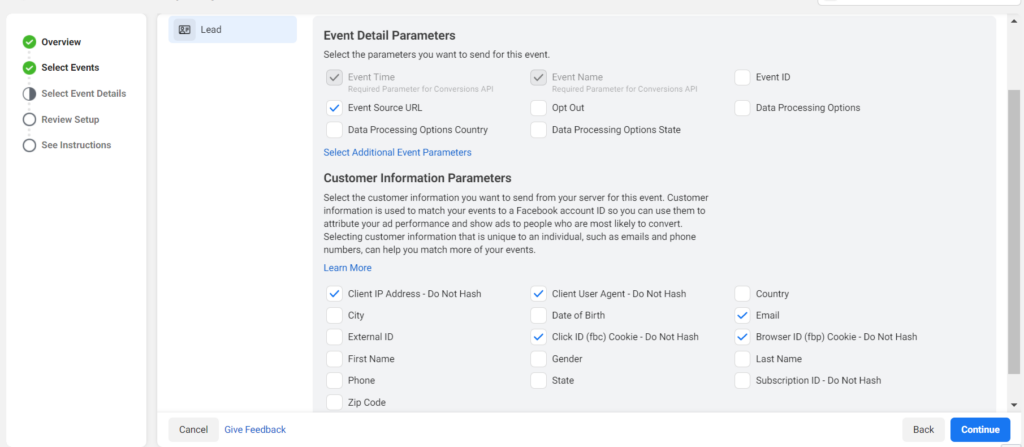
You will be asked to select the Event Parameters to send for the event. Event Name and Time are required. I recommend also sending the Event Source URL which is the page where the conversion takes place.
As for the Customer Information Parameters, this is the data Facebook uses to match the events to the ads. I’d recommend sending:
1- IP address: this shouldn’t be hashed
2- User Agent: the browser agent of the corresponding event
3- Email: this should be hashed
4- Phone Number: hashing needed
5- Click ID – fbc: this is Facebook click ID value stored in the _fbc browser cookie under your domain
6- Browser ID – fbq: this is Facebook browser ID value stored in the _fbp browser cookie under your domain
Once you confirm this step, you will receive the instructions to email to your developers so they can complete the implementation for you. If you are looking to set up this yourself, you may continue to the next step.
3- Send Events Through the API
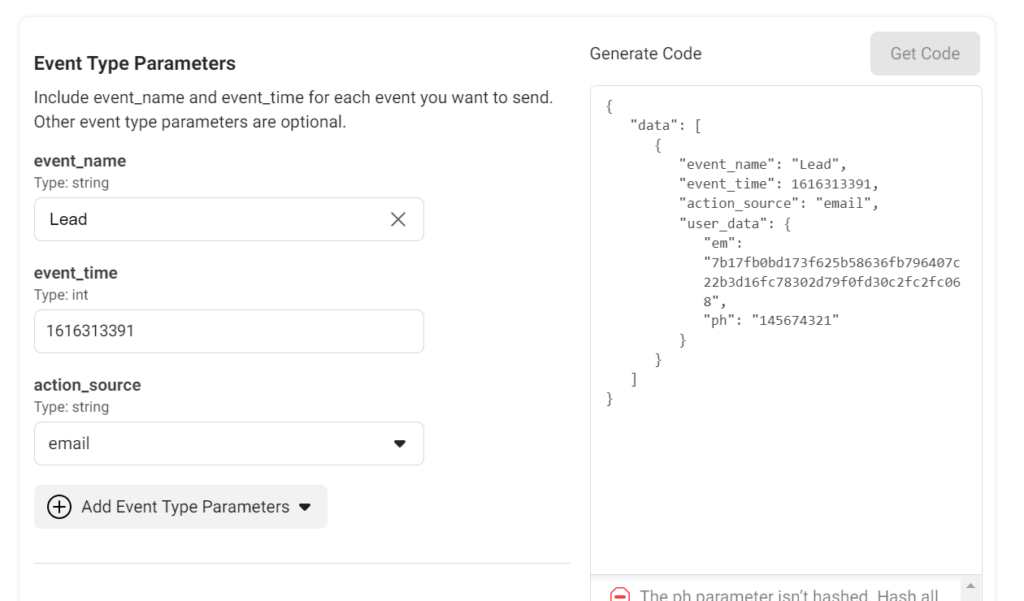
Once you have an access token, choose which events you want to send from your server, it’s time now to make POST requests and pass this data to Facebook. To build your payload, Facebook has an interactive payload helper to structure all the event and customer parameters.
This is a code example of sending the “Lead” event via making a POST request in Python without using the SDK.
import requests
from hashlib import sha256
import time
import os
import json


def lead_tracking(user_email, fb_click_id, fb_browser_id):

    fb_access_token = '<ACCESS_TOKEN>'
    fb_pixel_id = '<ADS_PIXEL_ID>'
    url = 'https://graph.facebook.com/v9.0/'+fb_pixel_id+'/events?access_token='+fb_access_token
    time_unix = int(time.time())
    email_hashed = sha256(user_email.encode('utf-8')).hexdigest()
    data ={
        "data": [
            {
                "event_name": "Lead",
                "event_time":time_unix,
                "data_processing_options":[],
                "user_data": {
                    "em": email_hashed,
                    "fbc": fb_click_id,
                    "fbp": fb_browser_id
                }
            }
        ]
    }

    r = requests.post(url,json=data)
    print(r)


fb_click_id ='fb.1.1554763741205.AbCdEfGhIjKlMnOpQrStUvWxYz1234567890'
fb_browser_id = 'fb.1.1558571054389.1098115397'
user_email= example@email.com

lead_tracking(user_email, fb_click_id, fb_browser_id)
This is another example of sending the “Purchase” event via the Facebook Python SDK:
import time
from hashlib import sha256
from facebook_business.adobjects.serverside.action_source import ActionSource
from facebook_business.adobjects.serverside.custom_data import CustomData
from facebook_business.adobjects.serverside.event import Event
from facebook_business.adobjects.serverside.event_request import EventRequest
from facebook_business.adobjects.serverside.user_data import UserData
from facebook_business.api import FacebookAdsApi

access_token = '<ACCESS_TOKEN>'
pixel_id = '<ADS_PIXEL_ID>'

FacebookAdsApi.init(access_token=access_token)
user_email= example@email.com
email_hashed = sha256(user_email.encode('utf-8')).hexdigest()
fb_click_id ='fb.1.1554763741205.AbCdEfGhIjKlMnOpQrStUvWxYz1234567890'
fb_browser_id = 'fb.1.1558571054389.1098115397'

user_data = UserData(
    email= email_hashed ,
    client_ip_address=request.META.get('REMOTE_ADDR'),
    client_user_agent=request.headers['User-Agent'],
    fbc=fb_click_id,
    fbp=fb_browser_id,
)

custom_data = CustomData(
    currency='usd',
    value=123.45,
)

event = Event(
    event_name='Purchase',
    event_time=int(time.time()),
    user_data=user_data,
    custom_data=custom_data,
    event_source_url='http://example.com/product/123',
    action_source=ActionSource.WEBSITE,
)

events = [event]

event_request = EventRequest(
    events=events,
    pixel_id=pixel_id,
)

event_response = event_request.execute()
print(event_response)

Entrepreneur focused on building MarTech products that bridge the gap between marketing and technology. Check out my latest products Markifact, Marketing Auditor & GA4 Auditor – discover all my products here.