Automatically Import Refund Data into Google Analytics
Data Import is one of Google Analytics powerful features that lets you integrate data from a variety of external business systems to gain a better understanding of your customers’ behavior. You can import refund data into GA and even use the imported data for reporting, segmentation and remarketing, giving you a complete and accurate view of your business using Analytics reports.
Uploading refund data to Google Analytics can happen in two ways:
# Hit Data Import: sending hits directly to Google Analytics through analytics.js tracking code. This is only for valid for businesses that have systems on their websites that allow users to cancel and request refunds online. However, many refunds don’t happen this way, customers often order online and request refunds over the phone.
# Management API Import: uploading hits to Google Analytics through the management API or directly from the platform. In this article, we will be covering how to automate uploading refund data through Google sheets. All you have to do is to share this sheet with the team who is in charge of processing refunds, so they can fill out the details whenever a refund occurs. So, let’s get down to business:
1-Create a spreadsheet with the refund data
Refund Data Import relies on the Transaction ID (ga:transactionId) to reverse Ecommerce hits in your data. You can refund the full amount of the transaction or issue partial refunds. To issue a full refund, you only need to upload ga:transactionId. The entire transaction, including all products, will be refunded using the originally reported product quantities, prices, and transaction revenue.
To issue a partial refund, in addition to the transaction id you need the ga:productSku and ga:quantityRefunded using a new row for each SKU being returned. Refunded transaction revenue will be determined automatically based on the product price and quantity.
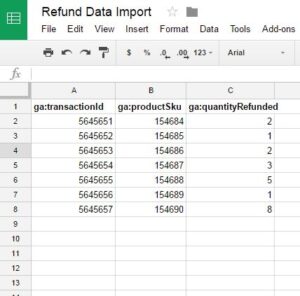
So in your Google Spreadsheet, the first header should use the internal dimension names (e.g., ga:transactionId instead of Transaction). In the example below, we added three columns; ga:transactionId which is required. ga:productSku and ga:quantityRefunded which are also required for partial refunds.
2-Create the Data Set through GA
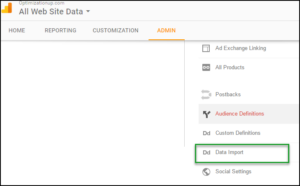
Go to the Admin panel of your GA account. Under the “Property” column, please select “Data Import” :-
Click New Data Set.

Select Refund Data as the Type:

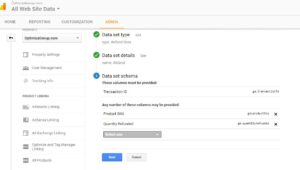
Define the Schema using the example above:
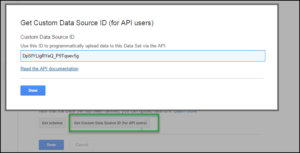
Save and then click “Get Custom Data Source ID (for API Users)“, copy the ID, will be using it later on.
3-Connect Google app script to your spreadsheet.
Once you have the data correctly formatted, it’s time to connect Google app script to your spreadsheet. Click tools then “Script Editor”:-
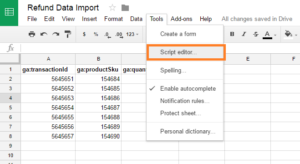
Now, the script editor is open:-
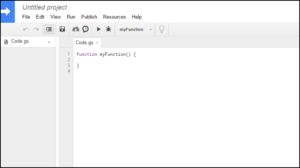
Delete any code in the script editor and paste in the code below:
function uploadData() {var accountId = "xxxxxxx";var webPropertyId = "UA-25xxxxx";var customDataSourceId = "CAuCSza1SXCifs79teXIEl";var ss = SpreadsheetApp.getActiveSpreadsheet().getActiveSheet();var maxRows = ss.getLastRow();var maxColumns = ss.getLastColumn();var data = [];for (var i = 1; i < maxRows;i++) {data.push(ss.getRange([i], 1,1, maxColumns).getValues());}var newData = data.join("\n");var blobData = Utilities.newBlob(newData, "application/octet-stream", "GA import data");try {var upload = Analytics.Management.Uploads.uploadData(accountId, webPropertyId, customDataSourceId, blobData);SpreadsheetApp.getUi().alert("Uploading: OK");}catch(err) {SpreadsheetApp.getUi().alert("Cannot upload: Failed");}}
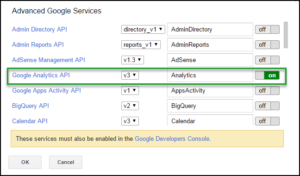
Please note that you need to replace what’s in red with your relevant data, the account id, the property id and finally the API id we generated in step 1 (above).Then, click “Resources” and choose “Advanced Google Services”:-

Turn on the Google Analytics API:-
Finally, try to run your script:-
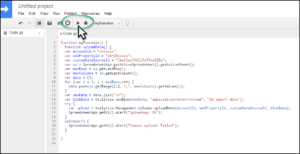
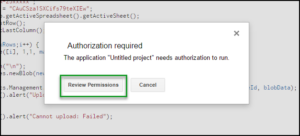
A small window will pop up asking you to authorize permission to access your Google drive and Google Analytics. Once you do so, the data will get uploaded successfully to Google analytics as long as it’s in the correct format:-
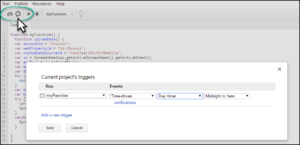
Now, you can schedule an upload to happen on an hourly, daily or weekly basis, Google will run the script and import the data exists your spreadsheet through their management API. On the other side, you should also agree with the team who is in charge of processing refunds to fill out this spreadsheet once a refund happens.
Once you’ve uploaded refund data, you can see it in the Sales Performance report. Please note that You cannot delete or modify refund data once it has been uploaded to your Analytics account. You bear sole responsibility for validating the accuracy of your refund data prior to sending it or uploading it to Analytics.
If you are also interested in importing cost data into Google analytics, please visit our guide here.

Entrepreneur focused on building MarTech products that bridge the gap between marketing and technology. Check out my latest products Markifact, Marketing Auditor & GA4 Auditor – discover all my products here.

HI Ahmed, great post!
How much time takes to get the imported data available in the GA reports?
Thanks!
Hi Leonard,
It takes up to 24 hours to process the data.
Let me know if you need any help 🙂
Best,
Ahmed
Hi Ahmed,
Hope you are doing great.
Tried your script and the procedure. There’s an extra ‘}’ in the code.
Fixed that while testing, but it still says upload failed. What’s going wrong? Any advice?
—
Thanks
Ratan Jha
Hi Ratan,
Thanks for this, the extra brace is now removed.
Can you share your spreadsheet URL to troubleshoot further? When you expand the error message in GA, what’s it say?
Best,
Ahmed
I am having issues when uploading data with the script from Sheets to GA, where the upload exceeds the maximum time.
This is a small file (~6.000 rows), how can we get around this issue?
Very good article, thanks
Hey,
I also tried it – but it’s not working and says: Upload failed!
Any idea what I could do?
Hello, I receive the “cannot upload” error when trying to use this Api technique.
Thank you for taking the time to put this information together. One quick observation is that the line reading for (var i = 1; i < maxRows;i++) should be <= or you'll truncate the final row.
What would be the steps if there was a change to the order–for example, they called in and added some additional items on an existing order?
Hi, considering that the team will update the sheet in a daily basis and that the script will run and upload the data in a daily basis too, can we just delete the transaction id from the past weeks to keep the sheet clean? I mean, once the refund data is uploaded, we can clean the sheet, right?